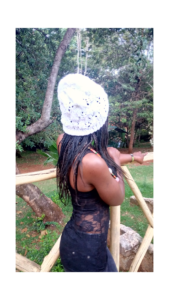
Knitting hats: The ribbed pattern

Howdy positive thinkers and team yarnkara. I hope this post finds you well.
Today I would like to let you in on an easy DIY project; how to knit a hat using the ribbed pattern.

For this project you are going to need the following materials –
•Yarn of preferred colour and size
•A size 4, 32 inch circular knitting needles
•A size 4.5, 32 inch circular knitting needles
•A pair of scissors
•Stitch markers
•A measuring tape
•A darning needle

Skill level requirement:
•Intermediate knitter

Stitches used
•Knit stitch (K)
•Purl stitch (P)

-Circumference of the hat-21 inches
-Knitting method used-circular knitting using circular needles
-Pattern used- ribbed pattern

THE PATTERN
•Using your size 4 circular needles, make a chain of 84-90 stitches, this may differ depending on the size of the needle and the yarn you are using.
•Make sure all your stitches are aligned properly before joining

The brim
•For the brim, knit one stitch followed by a purl stitch(K1,P1).
•Do this for 10-15 rows

The body
•Switch to the size 4.5 knitting needles; Knit one stitch and purl the next stitch. Repeat this all round.
•Repeat the K1, P1 until you reach the desired height

The crown
•Change from your circular needles and put your yarn through the darning needle
•Pass your yarn through all stitches and pull tight. You can repeat this twice then fasten off and weave in your loose ends.
•Cut your remaining yarn and your project is complete

The stitch markers are used to mark the beginning of each row.
I also knitted the purple cowl, using the same pattern.

THOUGH CONDITIONER.
Most people look at their current state of affairs and say, “This is who I am.” That’s not who you are. That’s who you were. Lets say for instance that you don’t have enough money in your bank account, or you don’t have the relationship that you want, or your health and fitness aren’t up to par. That’s not who you are; that’s the residual outcome of your past thoughts and actions. So we’re constantly living in this residual, if you will, of the thoughts and actions we’ve taken in the past. When you look at your current state of affairs and you define yourself by that, then you doom yourself to having nothing more than the same in the future.

James Ray

KNITTING HATS: THE BEEHIVE PATTERN

Howdy positive thinkers and team yarnkara; I hope you are well and hopeful of the future as I am.
Today I want to let you in on an easy DIY knitting project on how to knit a hat using the beehive pattern, if by any chance you get around to knitting one please share pictures of your hat for me to see.
Okay let’s get to it.

MATERIALS NEEDED
Yarn of preferred colour and size.
2 circular needles;-one size 4 32 inch circular needles and a size 5 32 inch circular needles.
Stitch markers.
Darning needles.
A pair of scissors.

Skills used
Increases

Beehive pattern

Stitches used
Knit stitches-K and Knit two together (K2TOG)
Purl stitches-P

KNITTING METHOD-Circular knitting using circular needles
CIRCUMFERENCE OF YOUR HAT- 21-22 Inches

Beehive pattern

THE PATTERN
Using your size 4 needles, cast on 100 stitches using the long tail cast on method
The number of stitches varies depending on the size of needle and yarn you are using, just make sure your hat measures about 21-22 inches in circumference.
Make sure all your stitches are aligned properly before joining.

Beehive pattern

THE BRIM
ROW 1: Knit you first stitch; purl your next stitch. Repeat these to end of row. (K, P)
ROW 2-10: Knit, Purl (K, P)

Switch to the size 5 needle now.

Ribbed brim

THE BODY
ROW 1-10: Knit (K)
ROW 11-20: Purl (P)
ROW 21-30: Knit (K)
ROW 31-40: Purl (P)

The body of the hat

THE CROWN
It’s now time to start decreasing.
ROW 1: Knit two stiches together then knit the next 8 stitches; repeat these ten times to end of row. K2TOG, K8 (You’ll have a total of 90 stitches)
ROW 2: Knit two stiches together then knit 7 stitches; repeat these ten times to end of row. K2TOG, K7 (80 stitches)
ROW 3: K2TOG, K6 (70 stitches)
ROW 4: K2TOG, K5 (60 stitches)
ROW 5: K2TOG, K4 (50 stitches)
ROW 6: K2TOG, K3 (40 stitches)
ROW 7: K2TOG, K2 (30 stitches)
ROW 8: K2TOG, K1 (20 stitches)
ROW 9: K2TOG (10 stitches)

Beehive pattern

Pass you needle through the stitches on your needle to bind off then use your darning needle to finish off your project. Weave in your loose ends and cut off the remaining yarn and your project will be complete.

The crown of your hat

Have an easy October guys.

Beehive pattern

THOUGHT CONDITIONER.
Drop the idea that you are an Atlas carrying the world on your shoulders. The world would go on even without you. Don’t take yourself so seriously.

Norman Vincent Peale

KNITTING HATS :A HEMMED BRIM HAT

Brim style: Hemmed brim
Knitting method: Circular knitting method using circular needles.
Stitches used: Knit stitches (K sts)
Purl stitches (P sts)
Knitting pattern: The stockinette stitches.
Size of my hat: The average human head circumference is 21 inches (54 cm).
Needle sizes: A size 4, 32 inch circular needles for the brim and a size 5 32 inch circular needles for the body.

hemmed brim hat

MATERIALS NEEDED
Yarn of preferred size and colour.
2 circular knitting needles of different sizes.
Measuring tape
Stitch markers.
Darning needle.

THE PATTERN
Casting on.
Using your size 4, 32 inch circular needles cast on the required number of stitches using the long tail cast on method. In my case I cast on 80 stitches.
Be sure that the number of stitches you cast on will be equal to approximately 21 inches or 22 inches.
Ensure that your stitches are aligned properly and not twisted before joining. Place a marker to indicate the end of the row before you start working in the round.

The brim
Work the stockinette stitch (knit) until your hat measures about one inch from the cast on edge.
Work one row of purl stitches to create a turning ridge.
Work one more inch of stockinette stitch.
Switch your circular needles from the size 4 to size 5, 32 inch circular knitting method before working the body.

The body.
Work the body of your hat using any type of stich of your choice. In my case I worked on the body of my hat using the stockinette stitch i.e Knit all round for all rows until you acquire a height that is required before you start working the decrease. In my case I worked my hat to a height of about 7 inches before working the crown.

The crown.
Now its time to start shaping the top of your hat.
We start decreasing from here.
Work in multiples of 10 stitches.
Row 1: K2 together, K8.
Row 2: K2 tog, K7.
Row 3: K2 tog, K6.
Row 4: K2 tog, K5.
Row 5: K2 tog, K4.
Row 6: K2 tog, K3.
Row 7: K2 tog, K2.
Row 8: K2 tog, K1.
Row 9: K2 tog.

stockinette stitch , hemmed brim hat.

Cut off your yarn and finish your project using your darning needle.
Weave in your loose ends and your project will be complete

Knitting hats: The stockinette stitch.

Howdy positive thinkers and team yarnkara, Eid Mubarak to all our Muslim brothers and sisters all over the world. Today we will get an insight on how to knit a hat using the stockinette stitch.

MATERIALS NEEDED
Yarn of preferred colour and size
Circular knitting needles
Stitch markers
A pair of scissors
A darning needle
A measuring tape

STITCHES USED
Knit stitches (K)

Brim style for my hat: Rolled stockinette
Knitting method for this project: circular knitting using circular needles
Yarn used: KNIT ME yarn.
Needles size: a size 4 and 32 inch circular needles.

THE PATTERN
THE BRIM
Using the long tail cast on method, cast on the required number of stitches for the brim of your hat using your size 4 32 inch circular needles. In my case I cast on 80 sts.
The size of your needle will vary according to the country you are in and the size of yarn you are using for your project and this will also alter the number of stitches you cast on.
Join at the end before you begin working in the round; be careful not to twist your stitches.
Knit for two inches.
Switch to the larger needle in my case to the size 5 circular needles.
The stockinette brim naturally rolls up into itself.

THE BODY
Work the body in stockinette stitch, that is; Knit all stitches for each round until you reach the desired height (about 7 inches)

THE CROWN
To decrease , work in multiples of 10 stitches.
Knit 8 sts, then knit the last 2 sts together(K8, K2tog) you will have 9 sts. Repeat to the end of the row.(90 sts)
K7, K2tog Repeat 10 times to the end of the row.
K6,K2tog
K5,K2tog
K4,K2tog
K3,K2tog
cut off your yarn and finish off with your darning needle

Knitting hats: The purl and knit diamond stitch hat.

Howdy #teamyarnkara hope you are well. I know I haven’t been writing much due to some unavoidable circumstances but I will ensure that I write whenever I can.
Today I would like to let you in on an easy knitting D.I.Y project. In this project we are working with different variations of knit and purl stitches to create a diamond pattern.

MATERIALS NEEDED.
-1 ball of 100gms acrylic yarn.
-A pair of scissors .
-A tape measure.
-Stitch markers .
-A darning needle.
-2 circular knitting needles.

ABBREVIATIONS.
P-Purl
K-Knit
K2TOG-Knit 2 together

SKILLS.
Increases
Decreases

knit & purl diamond stitch hat.

Knitting method for this hat-Circular knitting
Yarn used-KNIT ME CHUNKY yarn.
Needles used-Two 32 inch circular needles, a size 4 mm for the brim and 5 mm for the body.
Head circumference-21 inches
Brim style-Ribbed brim
This pattern works in multiples of 10 in case you need to alter the pattern in any way.

knit and purl diamond stitch hat

CASTING ON.
Using the long tail cast on method, cast on the required number of stitches, in my case I cast on 100 stitches.
This will work as your foundation chain.Make sure that all your stitches are aligned properly before working your next row.
To create the ribbed brim, you need to work one knit stitch then one purl stitch across your first row. Repeat this for 10 more rows.
ROW 1-10: (K1,P1)
I used a size 4 mm 32 inch circular needles for my brim.

purl and knit diamond stitch hat

THE BODY.
Switch to a bigger size needle, I switched to a size 5 mm.
ROW 1: *P1, K9*
ROW 2: *K1, P1, K7, P1*
ROW 3: *K2, P1, K5, P1, K1*
ROW 4: *K3, P1, K3, P1, K2*
ROW 5: *K4, P1, K1, P1, K3*
ROW 6: *K4, P1, K1, P1, K3*
ROW 7: *K3, P1, K3, P1, K2*
ROW 8: *K2, P1, K5, P1, K1*
ROW 9: *K1, P1, K7, P1*
ROW 10: *P1, K9*

purl and knit diamond stitch hat

You are now done with the body of your hat and you can start working your crown.

THE CROWN.
ROW 1: *P1, K7, K2TOG*
ROW 2: *P1, K6, K2TOG*
ROW 3: *P1, K5, K2TOG*
ROW 4: *P1, K4, K2TOG*
ROW 5: *P1, K3, K2TOG*
ROW 6: *P1, K2, K2TOG*
ROW 7: *P1, K1, K2TOG*
ROW 8: *P1, K2TOG*
ROW 9: *K2TOG*

purl and knit diamond stitch pattern

Knitting hats: #1

Hats come in handy, especially during cold seasons; So I decided to work on some knitting projects using circular needles. I did not focus on knitting projects last year but I’m hoping to turn that around.
Before working on this project, there are a number of choices you have to make and some planning to do.
You have to plan your knitting process by:-
-Choosing a knitting method
-Deciding the type of yarn to use
-Deciding the size of needle to use
-Determining the circumference of the head of the person you intend to knit the hat for.
-Deciding the pattern you want to create
-Deciding the brim style that you will use for your hat.
-Making a gauge swatch to determine the number of stitches you need to make per inch.
Once you have figured out all the above factors you are now ready to start your project.

MATERIALS REQUIRED.
-1 ball of 100gms acrylic chunky yarn.
-A pair of scissors
-Tape measure
-Stitch markers
-A darning needle

knitting hats

ABBREVIATIONS.
K-Knit
P-Purl
YO-Yarn Over
SSK-Slip slip knit
K2TOG- Knit 2 together
SK2P- Slip a stitch, knit 2 together then pass slipped stitch over.

SKILLS .
Increases
Decreases.

Knitting method for this hat- circular knitting
Yarn used- KNIT ME chunky,100% acrylic yarn.
Needles used- Two 32 inch circular needles,a size 5 mm for the brim and 6 mm for the body.
Head circumference- 21 inches
Brim style- ribbed
Stitches per inch- 4, therefore the total number of stitches to be worked is 84 stitches.
The pattern I’m creating works in multiples of 12 in case you need to alter the size of the hat in any way.

CASTING ON.
Using the long tail cast on method cast on the number of stitches needed for your hat, in my case I cast on 84 stitches.
This will be the foundation of the project. Make sure that all your stitches are aligned properly and not twisted before working your first row.
To achieve the ribbed brim, you need to knit one stitch and purl the next stitch all round.
Repeat this for 10 rows.
Row 1-10: (K1, P1).
I used a 5 mm 32 inch circular needles for the brim of my hat.

ribbed brim

WORKING THE BODY.
Switch to the size 6 mm circular needles.
Row 1: *P1, K1, P1, K2TOG, YO, K1, YO, SSK, (P1,K1)twice* repeat from * to * around.
Row 2: *P1, K1 ,P1, K5, (P1,K1)twice* repeat from * to * around.
Row 3: *P1, K1, K2TOG, (K1,YO)twice, K1, SSK, K1, P1, K1*.
Row 4: *P1, K9, P1, K1*.
Row 5: *P1, K2TOG, K2, YO, K1, YO, K2, SSK, P1, K1*.

Knitting hats

Row 6: *P1, K9, P1, K1*.
Row 7: *YO, SSK, K7, K2TOG, YO, K1*.
Row 8: Knit.
Row 9: *YO, K1, SSK, K5, K2TOG, K1, YO, K1*.
Row 10: Knit.

knitting hats

Row 11: *YO, K2, SSK, K3, K2TOG, K2, YO, K1*.
Row 12: Knit.
Row 13: *YO, K4, SK2P, K4,YO,K1*.
Row 14: Knit.
Row 15: *K3, K2TOG, YO, K1, YO, SSK, K4*.

Knitting hats

Row 16: And all even rows knit.
Row 17: *K2, K2TOG, (K1,YO)twice, K1, SSK, K3*.
Row 19: *K1, K2TOG, K2, YO,K1, YO, K2, SSK, K2*.
Row 21: *YO, SSK, K7, K2TOG, YO, K1*.
Row 23: *YO, K1, SSK, K5, K2TOG, K1, YO, K1*.
Row 25: *YO, K2, SSK, K3, K2TOG, K2, YO, K1*.
Row 27: *YO, K4, SK2P, K4, YO, K1*.
Row 28: Knit.

knitting hats

For a less slouchy hat stop here but if you want your hat to be more slouchy then repeat rows 15-28 one more time.
You are now done with the body of your hat and you can work your crown now.

WORKING THE CROWN.
Row 1: Knit
Row 2:*K4, SK2P, K5*
Row 3: Knit
Row 4: Knit.
Row 5: *K3, SK2P, K4*.
Row 6 and 7: Knit.
Row 8: *K2, SK2P, K3*.
Row 9 and 10: Knit.
Row 11: *K1, SK2P, K2*.

Knitting hats

Row 12 and 13: Knit.
Row 14: *SK2P, K1*.
Row 15 and 16: Knit.
Row 17: SSK.
Row 18: Knit.

crown of the hat
knitting hats
knitting hats
knitting hats

KNITCARE 101

Hallo readers, knitters, aspiring knitters and all positive thinkers out there, I hope you have had a great morning. Have you ever worn a knitted item, bought one for a friend or family member and with time you realized that your knitwear was either losing shape or increasing in size? Did you ever realize or find out the cause of this? If not this is an article for you to help you protect and care for your knitted items. So lets get started.

BEFORE KNITTING
Before knitting it is recommended that you do a gauge swatch for your intended pattern. This will enable you to know the number of stitches and rows to make per inch using a certain type of yarn and needles. The gauge will determine the size of your finished knitwear.
Some yarns come with free patterns and the pattern contains the instruction of how to gauge your project. After knitting the swatch, wash it, let it dry then take the measurements, if the swatch is bigger or smaller than what is required for the project, you can either use smaller or bigger needles/crotchet hook than the one you initially used. You may have to repeat the gauge swatch more than once to ensure that you get exactly the size of needles/crotchet hook to use.
When knitting items like sweaters, tops, laptop sleeves or phone cases it is recommended that you take the exact measurement of the person or item that you are knitting for, as these projects are unique to different individuals. Do not assume that what worked for a different laptop for example will work for another laptop, as laptops and phones differ in sizes and shapes.
For sweaters, tops and skirts you may knit them a few stitches smaller as they stretch when worn.
Ensure you read the instructions on the label of the yarn as it will give you some information on how to take care of any knitted item that is made from that particular type of yarn. It will tell you whether the yarn is machine washable or not, if it can be ironed or not and if its shrink proof or not among others.

WHEN KNITTING
After doing the gauge swatch you will have an idea of how many stitches to work per row and how many rows to work in general. It is advisable that as you build your project, stop and count the number of stitches you are doing per row to ensure that you do not skip any stitches along the way as this will alter the pattern, size and outcome of your project. Count the number of rows that you have worked to ensure that you have the desired number before you bind off.
For beginners you can use stitch markers to show you the beginning and the end of a row and also help you know where to put your stitches. Stitch markers can be personalized for example when I first started knitting I used yarn of contrasting colour to mark my stitches then I moved to bobby pins and eventually I learnt to work my stitches without any marker.
You can also use a tape measure to find out if you knitted the right size of knitwear especially if you took measurements for your project.

AFTER KNITTING
After completing a project it is advisable to block your knitted item. Blocking can be defined as the process of changing the shape or size of an item or returning it to its original dimensions by redistributing the knit weave. Blocking does not alter the pattern of your knits.
Items to be used for blocking include; straight pins, hangers and blocking mats among others.
Importance of blocking include:
giving shape to a knitted item
maintaining the shape of a knitted item.

WET BLOCKING
Fill a basin with lukewarm water, do not use hot water as its used for felting.
Use the required detergent preferably a liquid detergent.
Place your knitted item in water, lift and lower it gently but do not twist.
Empty the basin and gently press out excess water, be sure not to wring.
Fill the basin with clean water, place your knitted item back in and keep the item moving to rinse.
Squeeze out excess water without wringing.
Rinse a second time and a third if necessary to ensure that you get rid of all the detergent.
Lay the item flat on a dry towel, pat the top with a second dry towel to accelerate the drying process
lay it out to dry for thirty minutes or more and do not let it lay on a wet towel.
You can use straight pins to keep it laying firm.

STEAM BLOCKING
Steam blocking requires the use of an iron box.
Pin your knitted item to the desired dimensions making sure that the wrong side of the knit is facing up.
Wet a towel and wring out the excess water so that it becomes damp.
Place the damp towel on top of your knitted item
Set the iron box to its hottest point and press down gently.
Repeat this until the towel is dry then lay your knit out to dry.

N/B:
Never let your knitwear sit in water without agitating.
Undertake hand washing only when you have time to see the process to the end.
Wash one item at a time unless they are similar.
When taking knits for cleaning request that they may be measured and blocked. Incase of any previous custom blocking done to the knit let your cleaner know.
If your knit is multicolored let the cleaner know to ensure there is successful colour tracking.

STORING YOUR KNITS
Clean dirty knitwear before storing
Let it dry well before storing
Do not overcrowd your closet to enable your knitwear breathe
Keep away from moisture, dust and insects.
Fold your knits before storing them so as to maintain their shapes. This is important for seasonal or long-term storage
Use proper hangers for knits that are stored for a short term and avoid hanging heavy knits as they may suffer from the unequal distribution of its own weight
Do not store knits in polythene bags as they prevent the knits from breathing.
Use an ideal storage bag preferably with a zipper and a transparent window to allow contents to be seen without opening the bag.

REPAIRING YOUR KNITS
It is now quite certain that your knitwear may get a hole after using it for a long time do not think of disposing your knitwear. This is because the knitwear can be repaired. If you are not a knitter do not worry you can always look for a professional to fix it for you.
I sure hope that this article will benefit you in one way or another until next time have a successful day.

THOUGHT CONDITIONER
The fear of failure is the barrier to your success.

Knitting 101:Terms and Abbreviations

Good morning dear readers,knitters,aspiring knitters and to all positive thinkers out there.I am especially delighted to be writing this article today for I feel particularly happy this morning.I hope you are having a beautiful day and to all Kenyans,have a happy Madaraka day.
Today I would like to let you in on some of the knitting terms and abbreviations that are mostly used.This article will be beneficial for beginners,intermediate and advanced knitters as it will give you a general idea of interpreting the knitting patterns that you may come across and also help you when writing your patterns down.So let’s get started.

Terms and abbreviations
Stitch(es) st(s)
Cast on- abbreviated as CO
When knitting using double pointed needles the first thing to do after making a slip knot is to cast on a required number of stitches on one of your needles and then use your other needle to create other stitches so as to build your work.
Knit- k
Purl- p
Round(s)- rnds(s)
Right side – RS
Wrong side- WS
Place marker- Pm
As if to purl- purlwise
As if to knit- knitwise
Slip- SL
Slip Stitch- Sl St
Slip Slip Knit- ssk
Pass slipped stitch over psso
Together- tog
Through the back loop- tbl
Yarn Over- yo
Binding Off- BO
Main Colour- MC
Contrasting colour- CC
With yarn in the back- wyib
With yarn in the front- wyif
Knit into the row below k1b/k_b
Purl into the row below- p1b/p_b
Knit two together through the back loop- k2togtbl
Chain using crotchet hookch
Pass next stitch over- pnso
Double pointed needles- dpn
Yarn forward over needle- yfon
Yarn forward around needle- yfrn
End of row EOR
End of needle EON

Position abbreviations
Remaining rem
Beginning beg
Alternate alt
Continue cont
Following- foll

When making cables
Left twist- LT
Right twist- RT
Cross two stitches to the right- C2R
Cross stitch to the leftC2L
Cross two purl leftC2PL
Cross two purl rightC2PR
Back cross BC
Right cross RC

When Making Increases
Make one stitchM1
Make one away- M1A
Make one back M1B
Make one frontM1F
Make one left M1L
Make one right M1R
Make one towardsM1T
Make bobble MB
Make bobble number two MB#2

Thought conditioner: Life is a stitch,make it.

image
#yarnkara bags

Knitting 101:Saving for a project

Good evening beautiful people,I hope you are well.Today I would like to talk about saving money.You may be wondering why you need to save some doh for a hobby or leisure activity but I tell you that it is important to have some money kept so as to help you enjoy your leisure activity and even more to accomplish whatever project you choose to do during your leisure time.There are more than one reasons for an individual to save money,a few reasons maybe:-
To buy materials needed to accomplish a knitting project that you are planning to do.
For one to start knitting anything at all, there are items/materials that you MUST have.These include; knitting needles or crotchet hook(depending on the pattern that you are planning to knit), yarn of your choice (remember the size of your needles/crotchet hook determine the size of your yarn), a stitch maker(esp for beginners), a measuring tape, a tapestry needle(to weave in your loose ends) and a pair of scissors.
These materials need to be bought first by any beginner and that’s why you may need to have some savings to help you purchase these materials that are a must for any knitting project

image

image

image

Buttons,buckles,hooks and zippers are not materials to be used in every project but an individual can use them to accessories knitted bags,tops,sweaters and even scarfs.
Other reasons for saving money may be:-
For emergencies e.g sickness
For luxuries e.g to buy a phone
For a better future e.g fulfill future plans

HOW TO SAVE
For those without a permanent job you may choose to save the daily or weekly leftovers in form of coins.This form of saving may take longer for one to reach their target but the good news is you only need a little patience to get you there.
You may put the money in an air tight container with a small opening at the top to allow you put in your coins but not remove them.Most of such containers are usually destroyed when removing the savings from the container at the end of the time you set for yourself to save.This means that you should plan and save early enough before you embark on a certain project.

For those having a permanent job or with a regular source of income,plan on saving a certain minimum amount monthly and save it.Therefore make sure you know your monthly income, your monthly expenses, your monthly balance and how much you can save from your balance.

WHERE TO SAVE
You can save on your phone.For those in Kenya you can save on Mpesa,Mshwari and other mobile platforms.
These platforms allow you to save and control your money on your phone for a certain period of time.
You can have a lock savings account where you lock your money for a certain amount of time or a target savings account where you save until you reach a certain target.

You can save in the bank.We have a number of banks to choose from and I would recommend that savings for long term projects should be kept in the bank.You should ensure that the bank you choose has an interest rate that works for you and also ensure you are aware of how the bank operates in terms of withdrawing your savings and also the monthly deposits required.
N/B: Savings come in handy for a knitter, this is because sometimes a project may require more yarn and without savings on standby,you may be unable to complete your project because of lack of money to buy yarn, so ensure you have something in store for a rainy day.
To ensure that you gain financial discipline and develop a saving culture here are some tips:
1.Make sure you plan on how to use your finances.
2.Operate with a budget to ensure discipline,you may avoid carrying extra cash to avoid overspending.
3.You can postpone buying stuff that are less significant when saving for a project.
4.Keep a record of your expenditure.
5.Stop impulse buying or better yet don’t buy what you haven’t planned for.
6.Have a monthly review of your money.
7.Make sure you have a relationship with your money, make sure you understand where It is going and how It Is helping you.

Thought conditioner:
Life is like a beautiful melody,only the lyrics are messed up.


Knitting 101:Knitting needles;Type of yarn to be used.

Hallo beautiful people,today I would like to talk about the various knitting needles and crotchet hooks available in the market.This article will be very beneficial for a beginner who is not quite certain of which types and sizes of needles to use in a given project.Here is an insight on that.

Single-pointed needles
These needles are usually slender,with a point at one end and a knob on the other which prevents stitches from slipping when knitting.
They vary in length and diameter and are usually used in pairs.The size of a stitch is therefore determined by the diameter of the knitting needles you are using as it affects the length of yarn drawn through the previous stitch. Therefore to get large stitches use large needles and chunky yarn and for finer knitting, use small yarn.

image

Small and large single-pointed needles


image
Chunky yarn

                    Chunky yarn


image
Small/fine yarn

                    Small /fine yarn

The single-pointed needles are usually made of different materials e.g bamboo,steel and plastic.If you are looking for knitting needles that won’t bend  I would advice you go for bamboo or plastic knitting needles.
They are used to knit scarfs, tops,bags,snoods,cowls etc.

Double-pointed knitting needles.
They are tapered at both ends which allows one to knit from both ends.They come in different sizes and lengths and are usually used in sets of four or five.Three or two needles are used to hold the stitches while one needle is used to create new stitches.The double pointed needles are commonly used to knit in the round and can be used with either chunky or small yarn depending on the size of needles you have.They can be used to knit socks,skirts,cowls,tops,snoods and many more.

image

   Large double pointed needles

image

            Small double pointed needles

Circular needles
These come in different lengths,sizes and materials and are composed of two pointed straight tips connected by a flexible cable/cord allowing it to be used to knit in the round and also for flat knitting.These tips may be connected to the cable permanently or may be detachable allowing one to change the needles and either use larger or smaller needles than the one he/she started knitting with. Before buying circular needles ensure you know the length and diameter  of the needle you need for your project since the circular needles that can be used to knit a sweater may not be the best ones to use when knitting a hat as they vary in length.

image

                       Circular needles

image

Knitting in the round with circular needles.

Cable needles
They are used to knit cables.
They come in different shapes,sizes and materials.

image

Crotchet hooks
They come in different sizes and materials and they have a hook at one end.You will choose the size of yarn to use depending on the size of the crotchet hook,for chunky yarn use large crotchet hooks and for small yarn you should use small crotchet hooks.The size of the crotchet hooks vary based on the material, brand and country of production.The size is also determined by the diameter of the shaft and the shaft will determine how large your stitches will be.

image

                         Crotchet hooks

How to choose the right size of hook:
Look at the label on any yarn, there will be a suggested hook size and an estimated number of stitches per inch.For yarn that is locally made in Kenya there is no indication of the suggested hook size so make sure you use small yarn with the small needles and the chunky yarn with large needles.
You can do a gauge swatch by knitting a swatch with the stitch pattern you are to use for your project,wash your yarn and let it dry then measure your stitches.You may have to repeat this until you find the right size of crotchet hook needed for your project.

Tapestry needle.
Tapestry needles are the sewing needles with one blunt end and a big hole on the other end.They are basically used to sew in loose ends,fix a button on your knitted item and to generally accessorize your knitted item.The big hole makes it easy for one to put yarn into the needle and the blunt end prevents one from pulling thread when sewing in loose ends.Can be made of steel or plastic.

image

Tapestry needles

image

Thought conditioner:Beauty awakens the soul to act.